

Learn how to make the perfect brine recipe for chicken drumsticks. This step-by-step guide covers ingredients, timing, cooking tips, and flavor variations.
Why Use a Brine Recipe for Chicken Drumsticks?
A brine recipe for chicken drumsticks is one of the easiest ways to guarantee tender, juicy, and well-seasoned meat. Unlike simply seasoning before cooking, brining allows salt and flavor molecules to penetrate the drumsticks deeply, locking in moisture.
Whether you’re grilling, baking, smoking, or air-frying, brined drumsticks cook up golden on the outside while staying succulent inside.
The process is simple: soak chicken drumsticks in a saltwater mixture — often enhanced with sugar, herbs, and spices — for several hours before cooking. This extra step transforms even budget-friendly chicken into something restaurant-worthy.
Key Benefits of Brining Chicken Drumsticks
Brining is more than just seasoning; it’s a cooking science hack with proven results. The main benefits include:
- Juicier Meat – The salt solution helps drumsticks retain water during cooking.
- Deeper Flavor – Herbs, garlic, or spices infused in the brine penetrate beyond the surface.
- Tender Texture – Salt breaks down muscle proteins, making the meat softer.
- Cooking Flexibility – Brined drumsticks stay moist even with high-heat cooking methods like grilling.
By mastering a brine recipe for chicken drumsticks, you unlock consistent results every time.
Basic Brine Ingredients & Ideal Ratio
The foundation of every brine is salt and water. A typical ratio is ¼ cup of kosher salt per 4 cups of water. Adding sugar balances flavor and enhances browning, while aromatics elevate taste.
| Ingredient | Quantity | Purpose |
|---|---|---|
| Water | 4 cups | Base for the brine |
| Kosher salt | ¼ cup | Retains moisture & seasons meat |
| Sugar (brown or white) | 2 tbsp | Balances saltiness & aids caramelization |
| Garlic cloves (smashed) | 2–3 | Adds depth of flavor |
| Black peppercorns | 1 tsp | Subtle heat & aroma |
| Bay leaf | 1 | Earthy, savory undertone |
| Fresh herbs (thyme, rosemary, parsley) | 2–3 sprigs | Herbal freshness |
You can scale this ratio up or down depending on how many drumsticks you’re preparing.

Step-by-Step Brine Recipe for Drumsticks
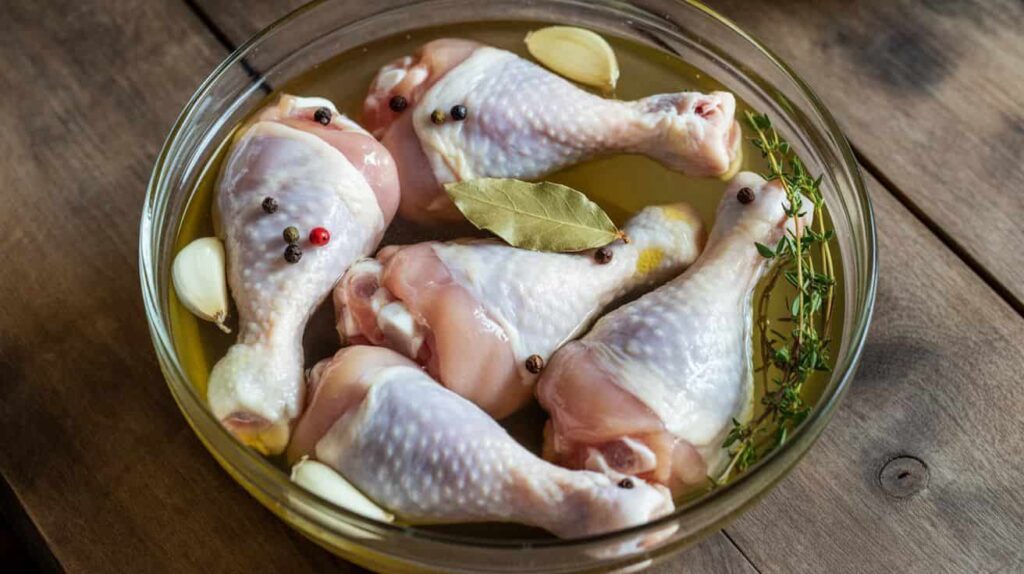
- Make the Brine – In a pot, combine water, salt, sugar, garlic, peppercorns, bay leaf, and herbs. Heat gently until salt and sugar dissolve.
- Cool Completely – Let the brine reach room temperature, then refrigerate until chilled. Hot brine can partially cook the chicken.
- Submerge Drumsticks – Place chicken drumsticks in a non-reactive container or large zip-top bag. Pour cooled brine over them until fully covered.
- Brining Time – Refrigerate for 4–12 hours. For best results, avoid brining beyond 24 hours to prevent over-salting.
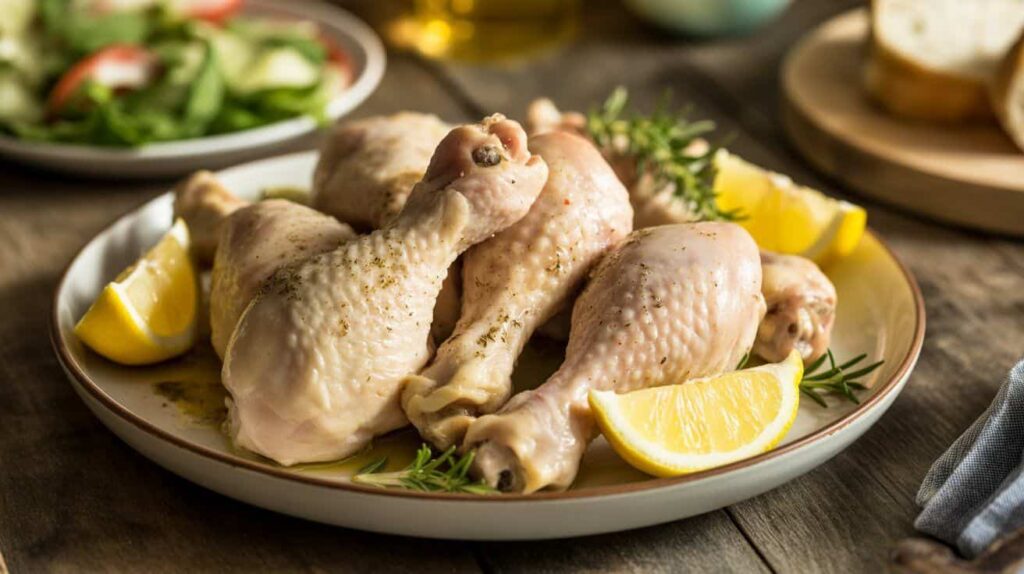
- Rinse & Pat Dry – After brining, rinse drumsticks briefly under cold water to remove excess salt. Pat dry with paper towels.
- Cook as Desired – Your brined chicken drumsticks are now ready to grill, bake, smoke, or air fry.
This brine recipe for chicken drumsticks ensures flavor penetrates deep inside the meat while locking in tenderness.
How Long to Brine & Temperature Tips
Timing is crucial. For chicken drumsticks, 4–12 hours is the sweet spot. Less than 4 hours may not infuse enough flavor; more than 24 hours risks a salty, mushy texture.
Temperature also matters: always brine in the refrigerator (below 40°F / 4°C) to keep poultry safe. Never brine at room temperature.
Cooking Methods After Brining
Once you’ve completed the brine, you can cook your chicken drumsticks in several delicious ways:
- Grilling – Creates a smoky flavor and crispy skin. Brined drumsticks hold moisture even with direct heat.
- Oven Baking – Bake at 400°F (200°C) for 35–40 minutes until golden brown and fully cooked.
- Smoking – Adds rich, deep flavor while the brine ensures juiciness through the long cook time.
- Air Frying – Brined drumsticks crisp beautifully at 375°F (190°C) in about 25 minutes.
Each method benefits from the brine, guaranteeing moist and tender results.
Seasoning & Flavor Variations for Your Brine
One of the best things about brining is how customizable it is. You can swap out herbs and spices depending on the flavor profile you want. Try these variations:
- Citrus Brine – Add lemon or orange slices for a bright, zesty note.
- Spicy Brine – Include chili flakes, jalapeños, or hot sauce for extra heat.
- Sweet & Smoky Brine – Mix in smoked paprika and honey for BBQ-style drumsticks.
- Asian-Inspired Brine – Use soy sauce, ginger, and star anise for an umami-rich profile.
These variations keep your brine recipe for chicken drumsticks exciting and adaptable for any occasion.

Tips & Common Mistakes to Avoid Over-Salting
- Don’t Skip Cooling – Always let the brine cool before adding chicken. Hot brine can ruin texture.
- Avoid Too Much Salt – Stick to the standard ratio; more is not better.
- Don’t Over-Brine – Leaving drumsticks in brine too long leads to mushy, overly salty meat.
- Rinse Before Cooking – A quick rinse prevents excess saltiness.
- Dry Well – Patting dry ensures skin crisps up nicely during cooking.
Nutrition & Benefits of Brined Chicken Drumsticks
| Nutrient (per 1 medium drumstick, cooked) | Amount | Benefit |
|---|---|---|
| Calories | ~150 | Provides energy with moderate calorie count |
| Protein | 18g | Supports muscle growth & repair |
| Fat | 8g | Adds flavor & satiety |
| Sodium (after brining) | Varies (300–500mg) | Electrolyte balance, but watch intake |
| Iron | 1mg | Aids oxygen transport in blood |
| B Vitamins (B6, niacin) | Moderate | Support metabolism & energy release |
Health Benefits: Brining doesn’t just add flavor — it helps retain lean protein and keeps chicken nutrient-dense. Choosing oven-baked or air-fried cooking methods can make this dish even healthier.
FAQ
1. Do I need to rinse chicken after brining?
Yes, a quick rinse removes excess surface salt and prevents overly salty drumsticks.
2. How long can I leave chicken drumsticks in brine?
Between 4–12 hours is ideal. Avoid going beyond 24 hours.
3. Can I reuse brine?
No. Once raw chicken has been in the brine, discard it to prevent bacterial contamination.
4. Is dry brining better than wet brining?
Dry brining saves fridge space and crisps the skin, but a wet brine recipe for chicken drumsticks produces deeper flavor and tenderness.
5. Can I freeze chicken after brining?
Yes, but dry thoroughly before freezing to prevent ice crystals from forming.
Hi, I’m Sidra Asif, the heart behind Chicken Bites. Cooking has been my lifelong passion, sparked by the magical meals I watched my mother create in our family kitchen. Over the years, I’ve explored diverse cuisines, earned a diploma in Culinary Arts, and refined my skills in professional kitchens—learning the art of flavor pairing, presentation, and creativity.
Through Chicken Bites, I share my favorite recipes, cooking tips, and culinary adventures to inspire home cooks to turn everyday ingredients into extraordinary meals. Join me on this flavorful journey where tradition meets innovation, and every dish is made with love! 🍗✨